Monday, May 13, 2013

T.P. Roll Mini Album

I'd like to welcome a really special friend, Toni Herron, to my blog family.  We met through facebook and she is an inspiration with all of her beautiful paper crafts.  I love to see what she has been up to on her blog, and learn to try to speak like an Aussie!!   She is a really quick crafter and such a sweetheart!!
You can check out her wonderful blog here:   Toni Herron...Scrap Crazy

Yes, I have been MIA from the blog scene for a while, but I have been crafting.  I recently made a Toilet Paper Mini Album for a swap.  It sounded like such a fun thing to do and I have long collected T.P. tubes having been a pre-school teacher, so another use for them really caught my attention.

First find 4 nice T.P. tubes and flatten them with a brayer, or just with your fingers and some heavy books.

Four T.P. rolls all dressed up!!
I took my little card stock sample papers to the store to find matching paint. Painted the T.P. tubes inside and out, let them dry and then measured them and started cutting paper just a bit smaller.  The girl that I was making my mini album for loves shades of blue and butterflies, so that is what I concentrated on.

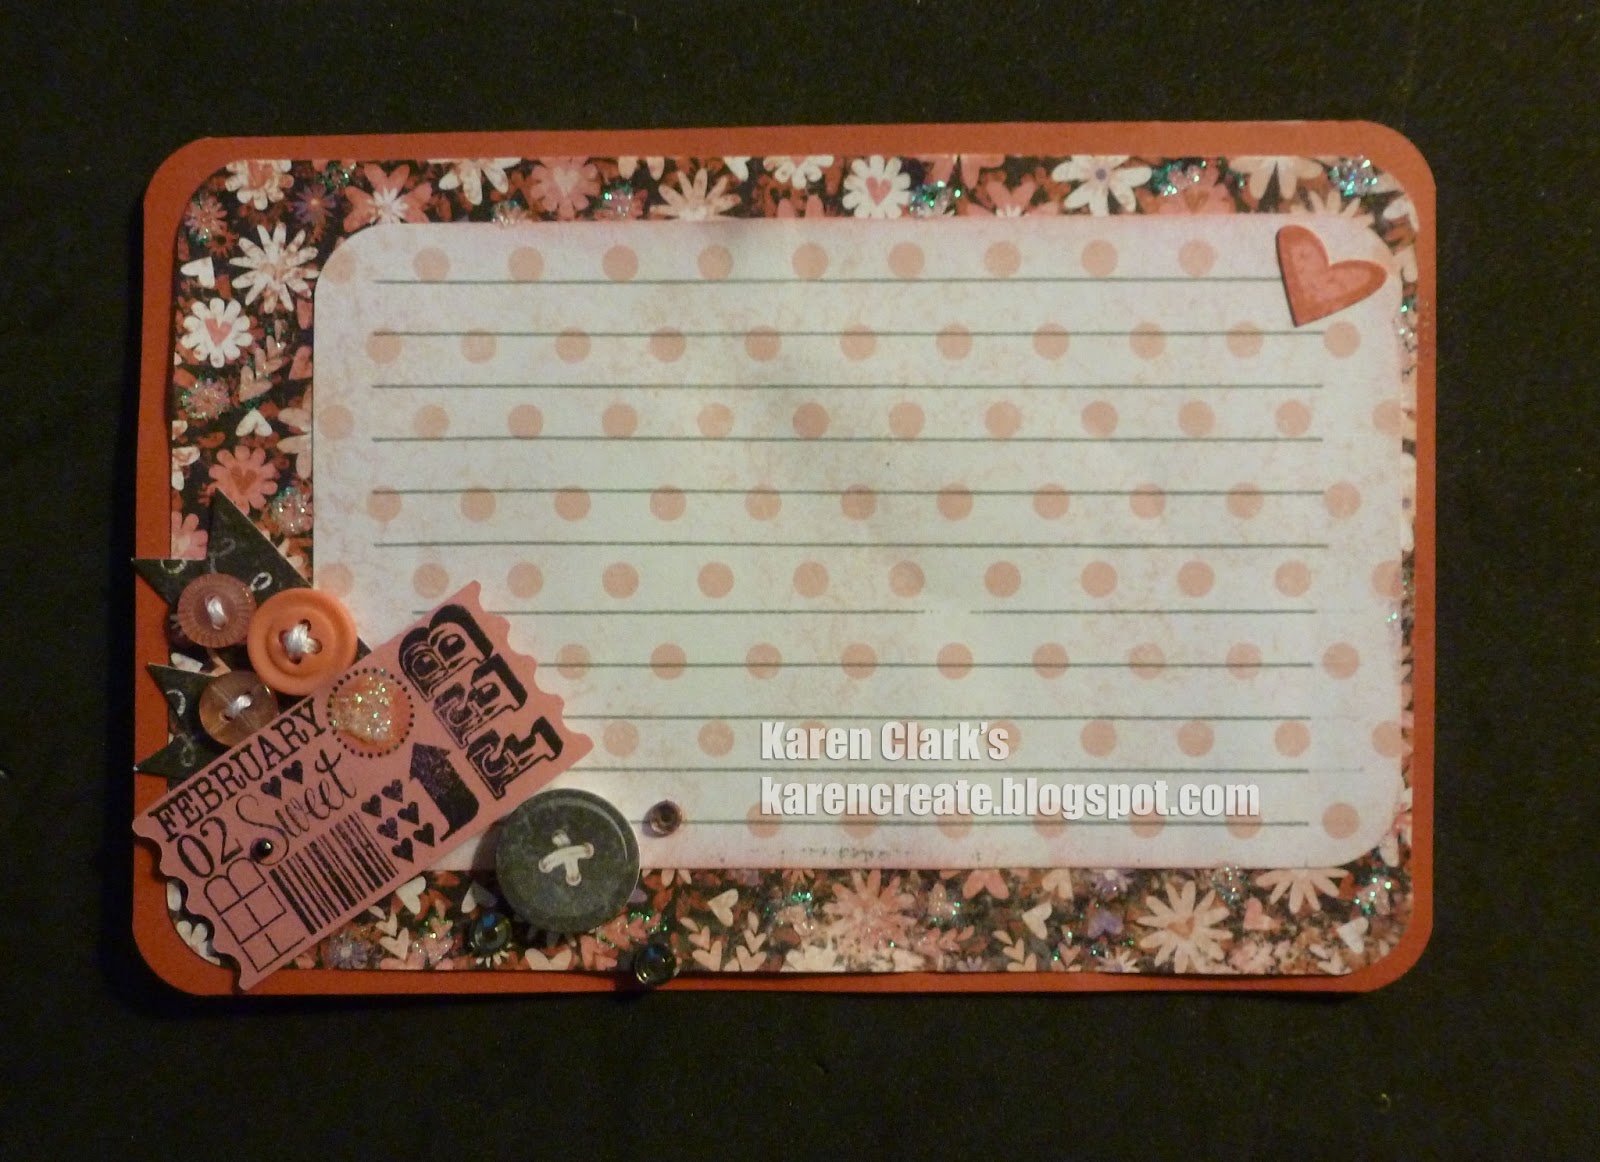
Each flattened T.P. tube page makes a pocket, and therefore needs a pull-out tag.


I added the charms on a cute little picture hanger that attaches with a brad.  I had to place it on the end so that it wouldn't interfere with the pocket, so it's a little awkward.  I am going to try this again on a different kind of album.  I really like the idea - it just wasn't quite right for this.  (Oh, the little photo comes out of the oval charm, so she can personalize that.)  :)

Back of page 1
The swap was supposed to have a Spring theme.  I kinda flunked that except for the butterflies and this wonderful quote, "anything seems possible in the spring!"


Think this will be really nice when photos are added....

Back of page 2


I sewed the buttons and ribbon all together and then attached it to the page with a couple of gel dots.

Back of page 3
For the last page I wanted to add something interactive - because that is the kind of thing I really like.  I had these little hinges, so I attached a flap and used a pretty brad to secure it - just tuck it under and it stays closed:


So when the flap is untucked and opened it looks like this:


Back of page 4
Since this is the back of the Album, I wanted it to look nice.  I was happy that the wooden butterfly that is serving the purpose of a pull tab, is also placed so nicely with the Washi Tape.  I think it looks cute.


Here is the whole album from the back:


TaDaa!!


It really didn't take me very long to make and I had so much fun with it!!!
Almost all of it is retired CTMH products so the matching was a breeze!!

You should make one!!  Some T.P. rolls and paper scraps!!  I had to buy LARGE rivets big enough for the book ring, but that was the only specialty item.  Everything else was foraged in my craft area (except the charms - I forgot!!  Got those especially for this.)

Hope you liked my baby album.  GET CREATIVE TODAY!!!
Karen

Saturday, March 23, 2013

More Journal Cards

Journaling Cards are all the rage right now.  It is a way to make a layout in pieces, you know a bit at a time, and arrange them around your photos.  You can put some photos on cards, mat some photos, whatever really.  It's your book, your life.

This is a card I made for a swap that had a month theme.  I signed up for February because I love this paper!!


It's a retired paper and stamp (Cherish the Day S1111), but you could make something similar with other paper.  I stamped the lines using another retired stamp, Recipe Box D1364.  It's always handy to have stamps with just lines!!

Once again, I had fun sewing on paper.  I pierced the holes in all of the cards first using the Piercing Tool Kit.  I love it because it has it's own foam to put under the paper, so I don't have to go looking for something else - or be tempted to do something inappropriate like scar the kitchen table!!  ;)  Then I just sat in front of the TV and sewed the  buttons on one evening accompanied by my furry doggie-friend.
So snuggly!!


Friday, March 22, 2013

Handmade Journal Cards

I made some more journal cards.  More you ask?
Yes, well, the others are in the backlog of artwork that I have yet to blog about.  Oops!!
I'll show some to you now!!

First for the newest ones:
I made this 4" X 6" Journal Card with For Always paper.  It was really fun to play with, especially with the Black Shimmer Tape.  So rich looking!!  I put a layer of vellum over the writing design so that the lines can be used for journaling.  I don't know if you can see the grey sparkle on the upper left corner, but it shows up in real-life!!


I couldn't decide which paper I wanted to use, so I decided to go for a sampling of each down the left side.

Next I made a 3" X 4" Journal Card made with Chantilly:


These were fun because each one looked different.  The frame stamp is an OLD one (Frame of Mind D1201)  I cut those out by hand.  I love the Cricut cuts, but it's fun to cut crazy sometimes too!!

Now let's see if I can find some of the others that I have around here...


I went wild with the Dotty For You paper on this one.  Used the Xact-O Knife and cut around each wing of the butterfly paper, popped them up and inserted some foam tape under there.  I sewed Xs over the printed Xs on the paper in the center of the butterflies also.  That was really fun.  No sarcasm.  It really was!!  :)

Lisa cut the vellum on the Cricut for me.  I inked the edges with the Sweet Leaf pigment block and embossed it with clear embossing powder.  Loved the effect.

You can't see it in that photo, but under the vellum there is a stamped image:


OK, I've been such a slow blogger lately that I decided that I should save the other cards for another blog TOMORROW!!

Go get Creative,
Karen


Friday, March 1, 2013

Floral Happiness

Today starts a brand new month (and how did it get to be March already??)
and a brand new Stamp of the Month!!  This stamp is called Floral Happiness S1303
and this is my finished card, keeping it CAS (Clean and Simple) just wanted to show off the stamp!!


I only used the middle-sized rose stamps.  It takes two stamps to make this image.  I practiced lining them up on scratch paper first and figured out what worked for me.  It was looking closely at the lower right corner (I'm talking about the green image here) and matching up what I was seeing there and along the bottom, then the rest just fell into place.  Mastering this on scratch paper took the anxiety out of the rest of the project!!

This is Floral Happiness S1303, so that you can see how each rose image is made from two stamps.


BUT what if I only use one stamp?  Carolyn (my Art Therapist ;) and I were discussing this on the phone.  I had thought of doing this on a small strip of card stock, but Carolyn suggested doing it on a larger sheet to see what might appear.  I haven't tried the largest stamp yet, but here are my experiments thus far...

Different colors help maintain the floral image.
Now for two different tries with Hollyhock tone on tone.  The top strip uses the smallest rose which looks very much like a flower no matter what you do with it, but the bottom part starts looking less floral as I ran the images into each other.  Still a romantic look when done in the Hollyhock.  Definitely looked Valentine-like!!


I used Sky ink to help detract from the floral feel of this stamp.

Again, I used the same middle-sized rose, but made lines of it right-side up then up-side-down.  This distorts the rose lines so much that they become almost meaningless.  I can't wait to use this paper!!

More experiments, but this time played around with what the stamp was intended for!!


Will post more cards for you tomorrow!!
Hope that you have a wonder-filled creative day!!
Karen

Friday, February 15, 2013

Clementine Paper Doll

When I saw the Paper Doll stamp set  D1547 I knew immediately that I wanted to dress her in the Clementine tiny floral patterned paper and it turned out just as I imagined!!  Paper piecing isn't for everyone because it requires a bit of detailed cutting (and I made 16 of these cards), but it was totally worth it.  She is such a cutie pie.  I ended up naming her Annie.


I stamped her shorts and purse on Daisy White Card Stock, so that the marker colors would show up true.   Her arms on Colonial White C.S., and her collar on Smoothie C.S.  Her hair is done with the two Crème Brûlée alcohol markers - just alternating them.  Her socks are the light color.  I used the darker Smoothie alcohol marker for her head band (Did you know that in England they call them Alice bands after Alice in Wonderland?) and the darker Smoothie on the flowers along with the darker Crème Brûlée.  Annie's shorts, purse and shoes are colored in with Light Indian Corn Blue and shaded in with the darker.  I love that each set of alcohol markers works together so beautifully for highlighting and shading.  It makes coloring SO MUCH FUN!!

For the card's background I was looking for minimal distraction from Annie.  I wanted a nice setting for her, but no competition, so I steered clear from the other Clementine paper - pretty as they are, and just looked at coordinating card stock colors.  I chose Smoothie and Crème Brûlée and cut them in long vertical pieces (since Annie is tall and has a strong vertical line) following the 1/3 rule so the card would be more interesting. Well, you can imagine how dull two pieces of plain card stock are, no matter how beautiful the colors.  It obviously needed some pattern.  I went to the Paper Doll stamp set  D1547 for inspiration and lo and behold, there is a round stamp that resembles a parasol (top-down-view) that was perfect!!


The "Hello" comes from A Garden stamp set  A1119


Lastly, I added three bitty sparkles: two for the buttons and one on the purse's flower.  They give just the right amount of glitz.

I LOVE PAPER DOLLS!!  When I was a little girl, my mom introduced me to Betsy McCall.  She was the paper doll in every issue of McCall's magazine.  Mom gave me a nylon's box to keep them in, and every month I would carefully cut out the clothes and, of course, save the story.


Good memories!!     Now I want to make Annie into a little girls's Birthday or Get Well card, with lots of clothes to color.  :)

Wednesday, February 13, 2013

Girls Rule

New cards with new paper!!  This paper has such beautiful colors that I really adore it. It's called Later Sk8r, and is thought of as "the boy paper."  OK, of course, it is perfect for the guys, but having worked for so many years with Girl Scouts, it happened to strike me as equally popular with girls, so I purposefully re-imagined it here, defying expectations:


You may recognize this card design from one of my last cards.  I especially like it for new paper packs because it shows off all of the different paper designs at one time. So pretty!!  I distressed all of the edges of each piece of paper with the roughest grit sandpaper on the sanding block. Here you can see the difference between the sanded "Girls Rock" versus the unsanded:


Originally I had planned to use more of the stamps from the Girls Rock C1538 stamp set, but ended up highlighting each of the paper designs and then went for a quote.  I think I will have to make a second card to explore the possibilities of this stamp set with this paper.  I love the idea of using "the boy's paper" for the girls!!


This new quote stamp set called Srapbook Statements - Women B1421  is amazing.  I love to collect quotes.


One of the first gifts that I made for my husband back at Purdue when we were dating was a plastic canvas needlepoint-covered blank book (remember blank books?) for him to collect his quotes.  (Yes, he still uses it!!)  This quote about Ginger Rogers is one that I have in my collection!!

Lastly, I had to add some of the new green and blue epoxy bubbles because they are so happy!!

(Aren't you proud of me?  I have relearned how to download images into my blog!!  Can't let myself get rusty ever again!!!!!)

 Hope that you are having some fun, creative time!!  (((((BIG HUG)))))  Karen

Sunday, February 3, 2013

I'm Back & Will's Gone Adventuring

I'm back and I can't believe that it is already February.  I have been away from the blogosphere, but not away from paper crafting.  It has just been busy, busy, busy around here.  My oldest son, Will, is right now en route to S. Korea where he will be living for the next year, teaching English to elementary school children.  You may remember that my daughter, Lisa, did the same thing less than two years ago.  We are all so excited for him.

This is my advice for him:


Yep, we have new paper and I LOVE it!!  Of course, that means that I had to say, "Good-bye" to many of my favorites.  :(  I get really attached to paper and stickers and embellishments, etc.  When I was a kid and had all of those pen pals, I kept the last sheet of every stationery set that I owned, and a sheet of all of my stickers.  Some of it went into my scrapbook in high school and some of it is still in a box in my basement!! I'm trying not to keep my paper in a box these days, but to create with it and share it.

A new Idea Book means so many new goodies to play with!!  Chantilly paper is so bright and beautiful and I have a thing for paisley.  :)  I used this design for this card to show off every paper in the packet at one glance.  The Hollyhock Zipper Lace is unique and it really struck my fancy.  For the sentiment, I chose the Maya Angelou quote from the new stamp C1539  Scrapbook Statement - Poets.  I did add the Pear card stock because my daughter loves green.  :)  I kept everything pretty clean and simple to let the paper colors and patterns speak for themselves,  I did pop the paisley rectangle up with foam tape to help it compete with the zipper lace.

Here's a photos of us at the airport this morning:


I'm on my tip-toes trying not to look too short next to Will, and my husband, Andrew, is hunkered down next to me in support.  Lisa is actually taller than I am.  (Tommy was home in bed with a nasty headache.  Poor guy.)

Bon Voyage Will - Enjoy the Journey!!
Lots of Love from your crazy family!!