Showing posts with label Tutorial. Show all posts

Sunday, November 18, 2012

Pansies? Why'd it Have to Be Pansies?

My aunt would like me to make birthday cards for her Bridge Club, and the first one she requested is to have pansies.  Did you know that I don't have a pansy stamp and I don't think Close to My Heart ever made one.  I could be wrong, but I haven't found one.

I walked around the house one day saying, "Pansies?  Why couldn't it have been butterflies?"  Do you know how many CTMH butterfly stamps there are?   A LOT!!  I'm not really upset at all.  I love a challenge.  It is actually much more fun to have to figure out a new way to do something, so this is what I am in the process of doing for my pansies:

First, I looked at a lot of photos on Google.  I picked one out and sketched it.  Then I outlined it with a fine Sharpee marker.  I traced the outline of the front 3 petals on a separate piece of paper and cut it out.


I made another copy, but only traced one of the back petals.


Below is my original sketch with the outline darkened for easier tracing, and the third stencil.


I lightly sponged ink in all of the stencils as a guide for the below watercolor.


This is my first of three pansies that I am planning for the birthday card.  I had to set it aside to work on some time sensitive things, but I can't wait to get back to finish it!!


Saturday, November 17, 2012

Clear Embossing Resist


Today is the unit meeting for Northern Stars, our area group of Close to My Heart consultants.  In addition to catching up on the news and sharing lunch, we will have a chance to go around the room and learn (or remember) 12 techniques.  Each technique is done at a station, on a different 3" X 3" square of paper, so that at the end each person will have a book ring with their technique squares attached.

These are the instructions for the technique square that I will be teaching today: 

1.  Ink Acrylic stamp using Versamark Ink Pad.  The best way to do this is to tap the pad onto the stamp so as not to over- ink the stamp.  Versamark is especially sticky and viscous.

2.  Stamp the image on paper.  Note that it may be completely invisible.  Trust that it is there.  ;)


3.  Sprinkle image with Clear Embossing Powder covering entire area.  (Hard with an invisible image, I know!!  For this sample it is probably best to lightly cover the entire 3” X 3” paper.


  4.  Tap off excess powder.  Ah!  There’s the image!!


5.  Move away from the embossing powder to use the heat tool.  When using a heat tool do not get too close to the paper and always keep it moving a bit.  Keep a close eye on the powder.  As the powder turns shiny, move the heat to a different area of your image.  Make sure that the entire image has turned shiny, and then it’s all embossed.  You can touch it already since it cools off quickly.


6.  What you have now is still pretty hard to see.  It’s time to add ink.  For this project, sponge Smokey Plum in the center, either in a circle or a diagonal line.  Surround the Smokey Plum by sponging lightly with Outdoor Denim.     Finish off the square with Slate ink varying the saturation at different corners to create a more interesting effect.


A few more examples appear on November 2, 2012 post entitled Stamped All Day.

I'm looking forward today to talking to and sharing with women from all over S.E Michigan (and even a few from Indiana and Ohio sometimes).  I hope that you all have a fun and creative time today as well!!

Friday, November 9, 2012

Modern Traditional Tag - In Progress

Yes, I realize that it's a strange title, but that's the name of the swap category.  Modern refers to the color palette, in this case Pear and Cotton Candy.

This is one of my the ornaments for the tag that I am designing:


It required the masking technique with a little twist, so I thought I would share it today. First I stamped the entire ornament on thin scrap paper and cut out the bird.  I put some repositional adhesive on the backside of the bird, then set the good-side against the stamp exactly in place.


It stuck there well enough while I lined it up on my ornament shape.  I pressed the un-inked stamp down and the bird mask stuck with the repositional adhesive.  Now it is perfectly in place to mask the bird.  Below you can see the mask alone on an ornament, as well as the finished stamp once the mask has been removed.

Also note on the carrier sheet, around the stamp image there is a little line and the numbers 2.5".  This lets me know to set my Cricut at 2.5" when I am cutting this shape on the CTMH Art Philosophy cartridge, so that it is the perfect size for this stamp.


Lastly, I cut a rectangle that was 1" X 1 1/4" to fit just the bird.I inked the center of this ornament in Cotton Candy and just printed the bird.  I attached it with foam tape for a little dimension.

I hope to be able to show you the finished tags tomorrow because time is running out!! Tick, tick, tick..


Monday, November 5, 2012

Technique Time 8) Masking

I've decided to make a new technique notebook.  I don't know why.  I just decide these things.  I used to have such a thing back in the day, probably 1996, when I was the Arts and Crafts Director at the Girl Scout camp.  That was a fun summer!!  (Another story for my storylane blog!!  Yea.  There's another decision made!!)

Masking Technique:

This is used when you want to combine two images.  I have a cardinal stamp and a branch stamp.  In order to make the cardinal appear to be in front of the branch, I actually have to stamp it first!!


To use this tutorial for the above card, substitute the cardinal for the eggs.


The mask is really dark here because I used it several times before.


I should have shown the cutout against another color, or raised on foam tape.  It would show it off much better.  


Tuesday, September 11, 2012

Sue's Belated Birthday Card

I started going through paper, thinking of Sue... can't use Avonlea because I just wrote her a Thank You Note on that a few weeks ago, hmmm, everything looked inviting.  Delaney wanted to go outside and there was the smallest of nips in the air and I started to think of the Fall weather.  That started me off.  I grabbed papers and stamps and more stamps and more stamps.  I didn't use them all - that's just how I get going - with a big flurry and whoosh.

This is where I started:


I was going to stop here, but I thought it might look suspicious as the right edge is too clean.

So, I added a few more little bits:
Now see what I did - I messed it all up!!
Never fear, we'll come back to that!

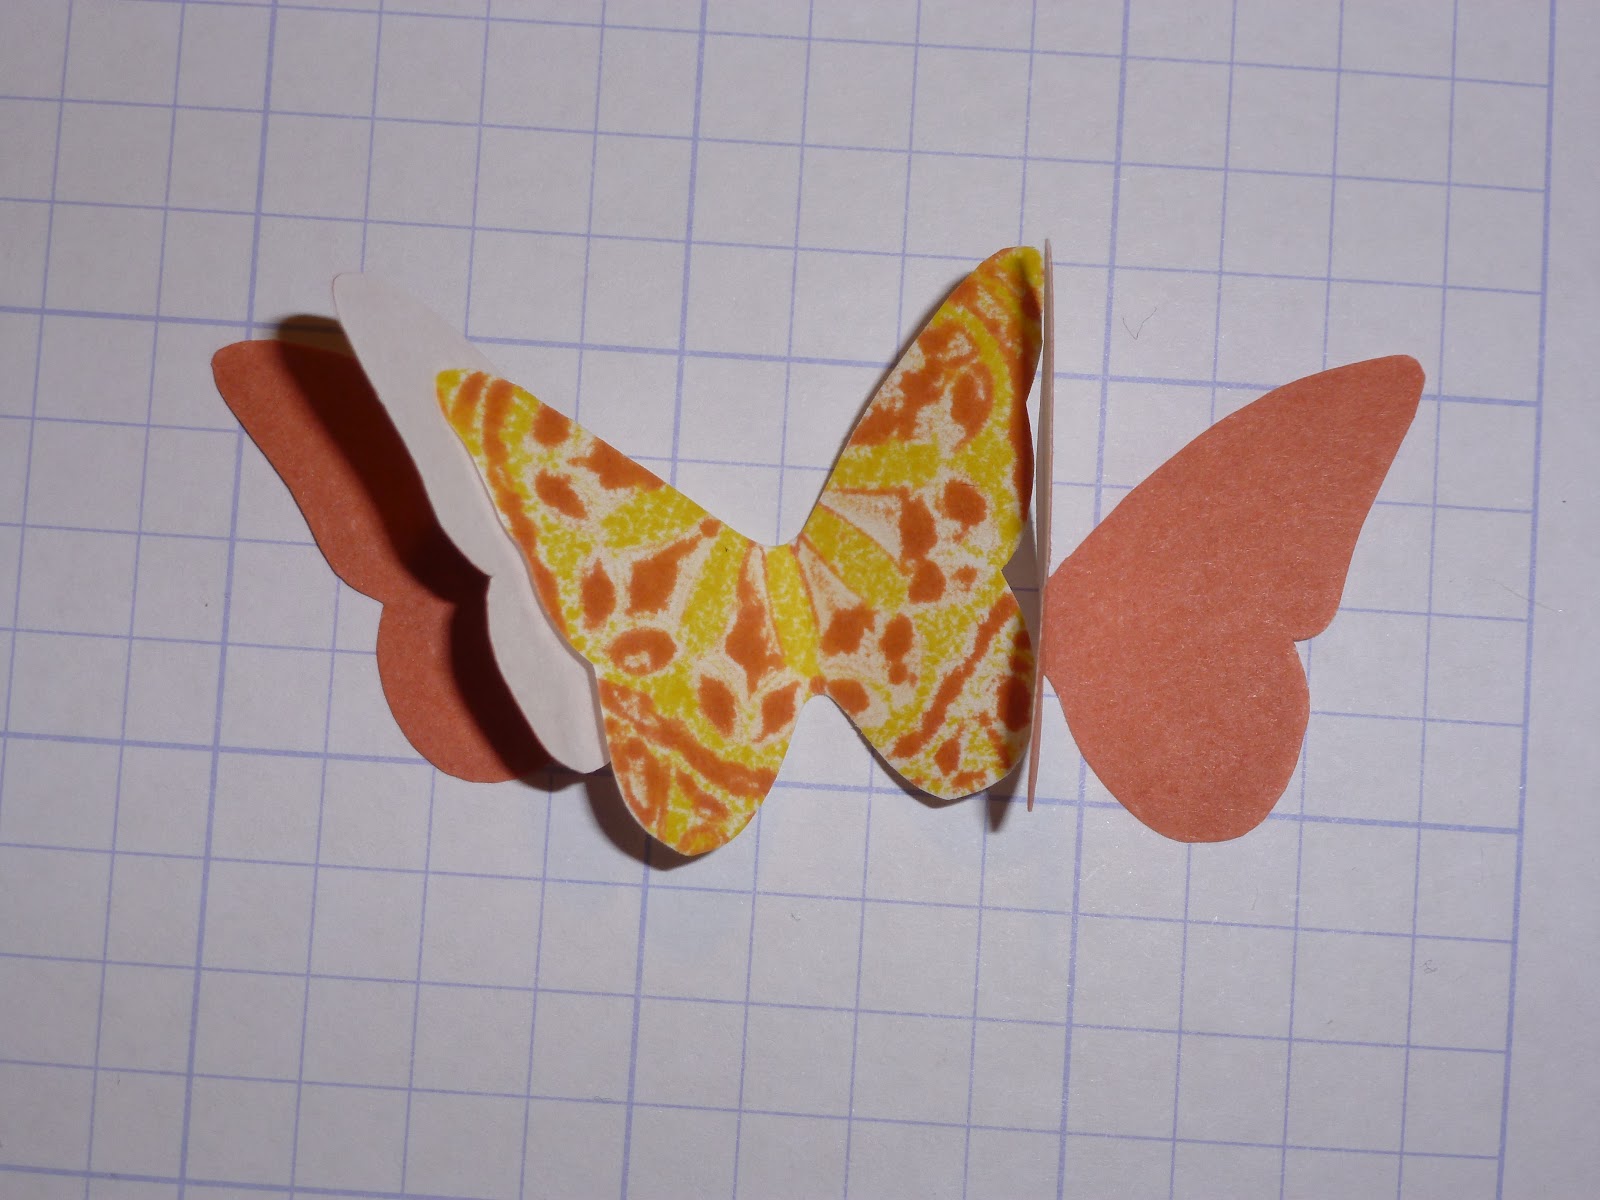
The next stamp features one of my very favorite things about Close to My Heart Stamps.  I call it "overstamping."  I'm not sure what it's technical term is.  I think I should know this, my great-grandfather wrote a book about printing - seriously - look:


Basically, you have at least two stamps that work together to make your finished image in more than one color.  The first image below is made up of the second Sunset image, plus the third Tulip one.
On the scrap paper you can see where I was working out my palette:
Twilight, Tulip and Sunset.
I edge nearly everything I do.  I usually use an eighth pie-wedge of a round sponge, but I only have two hands and I needed one to take the photo, so this is what I came up with.  ; )   Just dab the sponge on the ink pad and then swipe it on the edge of the paper.  Experiment!  I usually edge all of the papers in a project in the same color because that's the way Carolyn (my "art therapist") taught me!! and it looks good that way!


Now to cover up those ink marks that I accidentally got on the cover of my card...

Note how it was a good thing that I added those marks on the right margin of the card. It just didn't look like real paper with out them.  

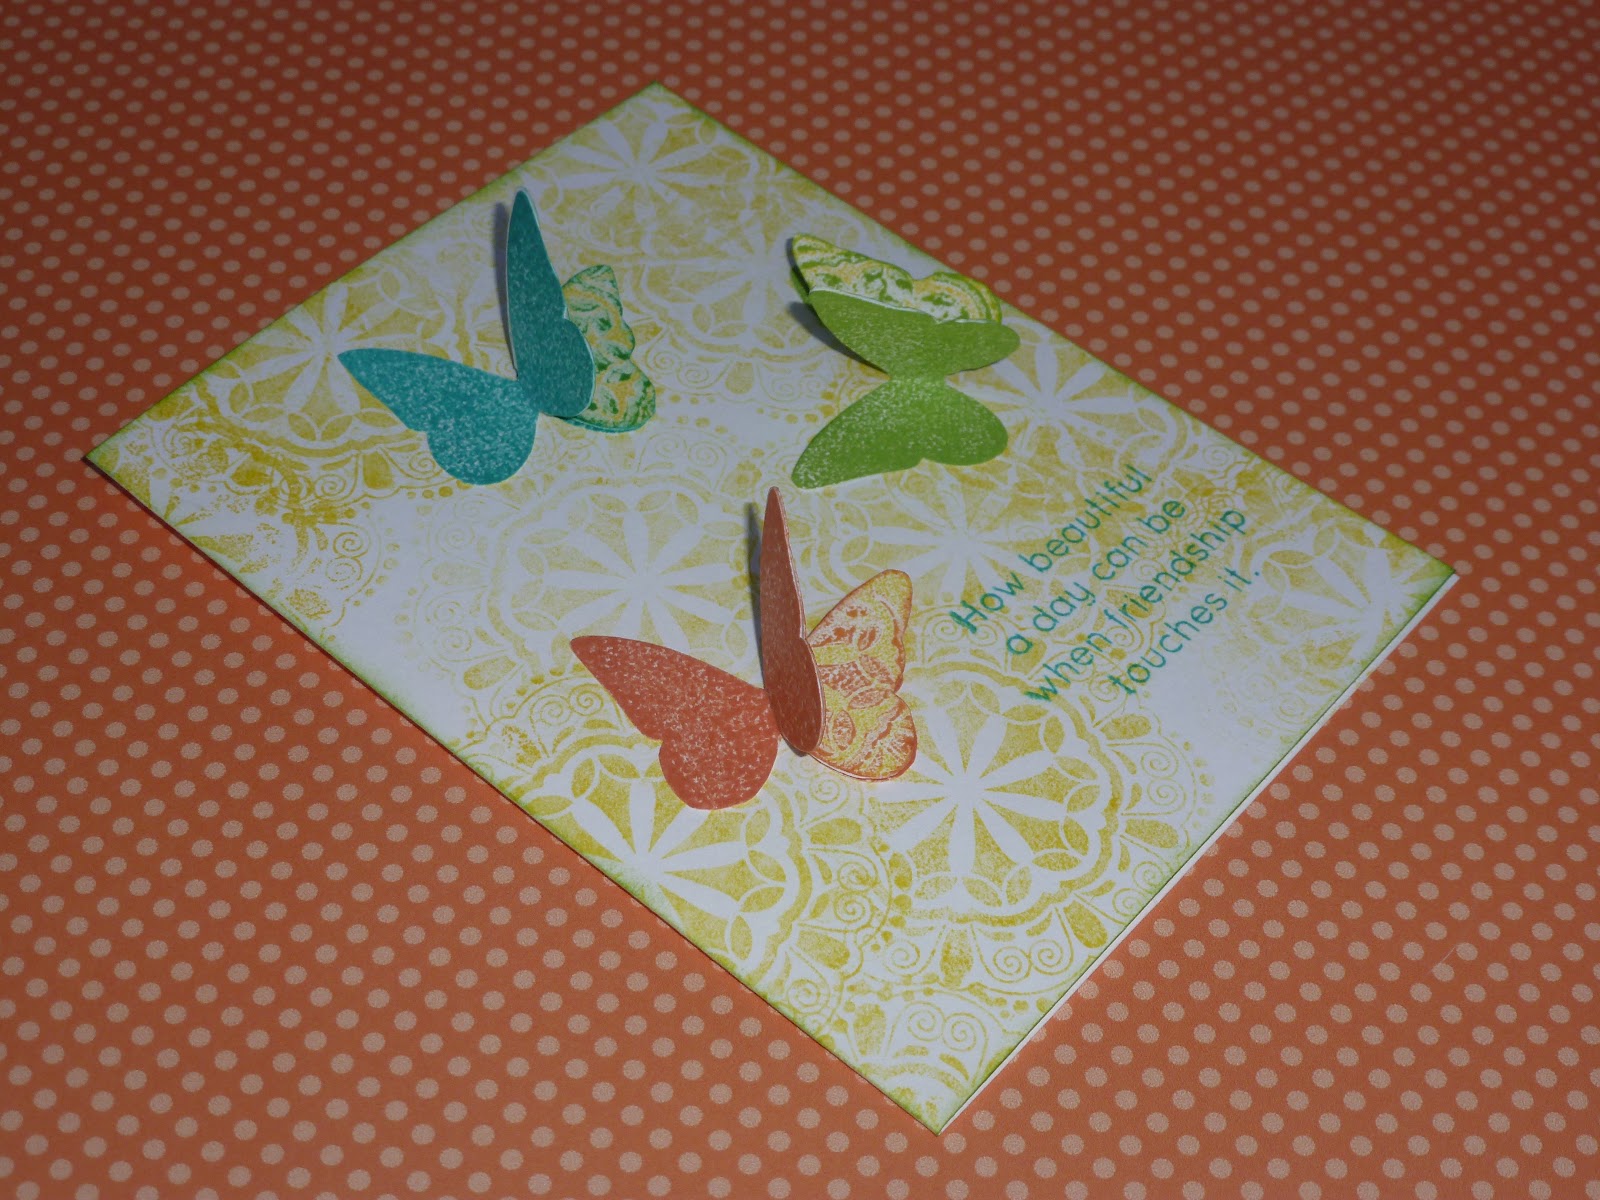
OK, so we're skipping to the completed card - like the magic oven on the cooking show!! The vertical "bookmark" stripe (that's what I see it as  because Sue is a BIG reader) is a bit more right-justified than I had originally envisioned in order to cover up my ink boo-boo, but I like it - and it passed the Will inspection.  (Huh, I see Will's been doing a bit of sneaky editing here.  I guess I'll let him get away with it this time.)  The rest of the cards I make today will be made to this same pattern.  So take that Ink Gremlins - you won't get me down today!!

The Ink Gremlins got me again - this time we cover up with sparkles. not too spread out because I write a lot.
Who would have thought, huh?

The background paper is from Florentine.  It was going to be in my card at first, but then I started with the background stamp.  It did provide me with the Twilight and the Sunset and I just threw the Tulip in on a whim.

Lastly, something for the back.  Sue does volunteer work since she recently retired, and I love this quote and the way it flows, so I thought it was perfect.  I had to curve the stem a bit more to make it fit width-wise, but I think it works.  The dandelion puff is stamped in Crème Brûlée and then I carefully just rolled the edges of the puff in Sunset.  This is called "Rock and Roll" and it's a really fun technique.  Play around with it!  BUT always stamp in the lighter ink first so as not to contaminate your ink pads!!!!


Hope it was a really Happy Birthday, Sue!!
Love, Karen

Thursday, August 30, 2012

Stamp Lingo

This is back to the basics.  My sister-in-law, Gail  - Hi Gail!  ; )  - is taking the plunge after being an avid follower of my blog these past couple of weeks and is going to start stamping!!  Gail is a very talented seamstress, quilter, cross-stitcher and smocker (I'm making up some of these words, but that doesn't diminish her skills!!)  She's done a lot of crafts including rubber stamping the "old way."  She just needs to learn about acrylic stamps and some of what has been happening lately.  Basically what I have been learning the past two years.

So here we go, Gail, and anyone else who is interested.

As with anything new, it's all about the lingo, so even though I catch myself saying rubber stamps - it's ACRYLIC these days - and what a difference that makes.  A see-through stamp on a see-through block.  What a concept.  It opens up a whole new world! (Cue music.)

If you were a collector of rubber stamps, they were bulky to store.  Acrylic stamps are thin. They peel off of their carrier sheets, as needed, and are placed on a clear block to be used.  Then after being cleaned they are returned to the carrier sheet - right back to their photo.

Getting started with my double stamp set - It"s Your Day
(available till September 30, 2012
for $5 with a $35 purchase)

 For my example, I am using 4 stamps together on one block as a small collage.  This would have been difficult to do with the old style rubber stamps.  Don't get me wrong.  I loved my rubber stamps, but this is better!!


An important thing to be aware of with acrylic stamps is that they don't have that little spongy part that exist in a rubber stamp between the wood and the rubber, so we take care of that with a sheet of spongy Styrofoam-like material.  This sheet comes with your stamp set and serves both as protection for your stamps in it's package as well as a work surface.  Place it under your scrap paper (a large sheet of blank newsprint works well.)


In the photo above I show the cushiony material on top of my scrap paper just so you can SEE that I am using it.  In all of the other photos on my blog - just know that it is there!!  I'll remind you occasionally.  ; )


The beauty of being able to see through the stamp and block is that you are able to line up your image and stamp it where you want it.  OK, so it's not perfect every time, but it's pretty close.   Take it from someone who did a lot of rubber stamping.  No matter how hard you concentrate, you CANNOT see through wood!

I wanted a bit of a zigzag border, so I  pieced this pattern together all around the edge.  I made some mistakes, but I don't think anyone would really look closely enough to notice.  I sure didn't at first!
Finished card complete with sparkles

Wednesday, August 29, 2012

Butterflies Popping Up Everywhere

There's a special 2 stamp set that is available right now.  It looks like this:


FYI, it's $5 with a $35 purchase.  A great deal, but what to do with it?

I saw it and I really wanted to make those butterflies FLY!  I immediately remembered a trick I learned from someone when I was a Girl Scout leader (which I did for 14 years with my daughter).  It's a really neat trick with stickers and I learned it with butterflies.  You need 3 symmetrical stickers to make one butterfly pop.  The "hidden" two stickers are each folded in half with one half attached to the paper and the other half attached to the popping butterfly.  How do I show this to you?


I stamped 3 butterflies: 2 solids and 1 fancy to pop, fold each of them in half as shown.

FRONT                                 BACK
Using your double sided adhesive runner adhere half a solid butterfly wing to the back of each fancy butterfly wing so that if the solid butterflies were each folded in half they would each stay on their own half behind the fancy butterfly.  When opened and turned around, you will see the white paper half of each solid butterfly.  This will be adhered to your project.


In this photo you can see one of the "hidden" butterflies attached to each popping butterfly.  There is another one on the other side.

The solid butterflies are the hidden ones - meant to look like a shadow.

This view might help you to see how I had to stamp and cut out 3 butterfly pieces in order to make one popping butterfly.


Now for the other fun tip.  I used the solid butterfly stamp with Sunny Yellow (it's the only yellow I have), then I inked the mandala from the Beautiful Friendship B1400 in Pear (then Sunset, then Pacifica for the other two butterflies).


I pressed the solid yellow butterfly against the Pear mandala and transferred the green design to the butterfly.  When it was stamped both the yellow and the green show up.

This transfer technique is called kissing.  Awwww.


This shows the cut pieces that is takes to make 3 butterflies.  (I like to cut!)  Click on it to enlarge to see where I cut the butterfly's body off.  Don't worry, I put it back on in the end.


Extra stamped butterflies, one in each color, used to make liquid glass body.  I cut body out when dried.


Finally finished!!  Hope you like it.