Wednesday, November 28, 2012

Back in the Day

I've been away doing the migraine-thing.  So far the new meds aren't doing anything for me, but I persevere!!

So, I'm cheating today by showing you some quilling that I did back when I was expecting my first baby - 25 years ago!!


Lisa helped put up and decorate her grandparent's Christmas tree after Thanksgiving. I thought I should take the opportunity to photograph some of my old friends as, of course, I didn't make any of these for myself.  I've learned to be a bit better about that these days.


Back in the day, I took ceramics classes so that I could make the bases for my quilling as well as a few other pieces.  This is a potpourri container.  I think it measures about 6" in height.  This design is undoubtedly one of Malinda Johnston's, or closely based one.  I think all of her books are out of print, but available on amazon.com.  Her company, Lake City Crafts, still exists, but I don't know if she is associated with it anymore.  She inspired me through all of my hours of quilling, and is one of the greats!!

Now, here is a story that took place back in those days.  It has nothing to do with crafts, but it's...
Well, it's one of my often told stories!!  (For some odd reason, there are weird formatting problems!?)


The Stranger in the Drive       (from storylane.com/karenclark)

Lisa was an infant, about two months old I think, and I didn't know anyone in our neighborhood at the time.  I'm not sure that it would have helped anyway.

Her bedroom faced the front of the house and ours the back.  Behind us was all cornfield,
although to the sides we had neighbors. It was a pretty typical subdivision in the late 1980s.
Pretty much everyone was at work, just the baby and me at home in our little neighborhood. 
I never thought of it that way before.

I looked in on our sweet little girl as she lay napping and then peeked out her window
at the beautiful Poplar Tree in the front yard when I spotted an old car in our driveway.
Huh?  What's is that doing there?  We don't know anyone.  And there's a man just sitting 
in it.

My heart started racing.  I checked Lisa.  Still sleeping. I stood more to the side and just barely peeked.

He is't making a move.  Just sitting there, not exactly looking menacing, but not looking innocent either.

I moved cautiously to my bedroom and peeked out my bedroom window for accomplices.  No one there.  I called my husband at work (a good half hour away) and started filling him in as I proceeded around the house furtively trying to spot anything out of the ordinary.  I also continued to check on the stranger in the car and, of course, my sleeping baby.

I had quickly formulated an escape plan.  There was a gate in the back fence into the corn field.  The beagles, baby and I could make a run for it into the next subdivision over which was so much larger than ours that surely there must be someone home during the day.  
The stranger is still not making any move.

I finally agreed with my husband to just call the police.

I may be the only housewife in the history of housewives to have called the police on the police!!  He was an undercover cop!!  It turns out that our subdivision was across the street from an apartment complex that was known for it's seedier side.  Well, not that well known.  We didn't know!!

The nice officer on the phone figured out fairly quickly what was going on (probably by calling the undercover cop in the area to check it out!!)  He told me that he knew the officer in my driveway and that he was a really nice guy and that I shouldn't be worried.  The next thing I knew, my doorbell was ringing and a very chagrined, very scruffy young man was at my door apologizing profusely.  I assured him that I was fine and that he was free to stay, but he was so embarrassed that he got out of there as fast as he could go!!

It turned out that our driveway gave him a beautiful vantage point to keep an eye out for a drug trafficker that he was, well, keeping an eye on.  He had no idea that he had been terrorizing me.  He assumed that we were at work like all of the neighbors.


P.S.  My daughter Lisa now does quilling and did hours and hours of it for her girlfriend Megan's wedding.  Megan can now quill as well.  They were very creative in all of the wedding preparations.


Saturday, November 24, 2012

Lily's Flip Flap Mini Albun

Hi everyone!!  We're back from our Thanksgiving visit (which was lovely, and yummy), and I had a pretty productive day today considering my headache.  The new medicine either hasn't kicked in yet, or just isn't the answer.  I'll keep trying it out though.

This mini album is for one of my followers.  I'm still trying to keep up on my birthday RAK (Random Acts of Kindness).  It's time to up-date my list already.  As usual, I could use an assistant!!!!

Will was headed to Lily's party, so this is what I sent along with him:

I dyed the ribbon Smoothie with one of the new alcohol-base markers.

First, I have to give total credit to Sara Batkin for the base design of this mini album!! Check out more of her Flip Flap Mini Albums here.


I love making these.  This one is tiny - only 3" X 3".


This album keeps unfolding as if by magic.  The Smoothie card stock pages are stamped with a coordinating stamp set.


Here's the back.  This paper is Unforgettable.  It's a retired pattern that I used because Will said that her party was at a Japanese restaurant.


Happy Birthday Lily!!  May you have many, many more birthday celebrations to come -
shared with special friends,
and filled with love!!
Enjoy, Karen


Sunday, November 18, 2012

Pansies? Why'd it Have to Be Pansies?

My aunt would like me to make birthday cards for her Bridge Club, and the first one she requested is to have pansies.  Did you know that I don't have a pansy stamp and I don't think Close to My Heart ever made one.  I could be wrong, but I haven't found one.

I walked around the house one day saying, "Pansies?  Why couldn't it have been butterflies?"  Do you know how many CTMH butterfly stamps there are?   A LOT!!  I'm not really upset at all.  I love a challenge.  It is actually much more fun to have to figure out a new way to do something, so this is what I am in the process of doing for my pansies:

First, I looked at a lot of photos on Google.  I picked one out and sketched it.  Then I outlined it with a fine Sharpee marker.  I traced the outline of the front 3 petals on a separate piece of paper and cut it out.


I made another copy, but only traced one of the back petals.


Below is my original sketch with the outline darkened for easier tracing, and the third stencil.


I lightly sponged ink in all of the stencils as a guide for the below watercolor.


This is my first of three pansies that I am planning for the birthday card.  I had to set it aside to work on some time sensitive things, but I can't wait to get back to finish it!!


Saturday, November 17, 2012

Clear Embossing Resist


Today is the unit meeting for Northern Stars, our area group of Close to My Heart consultants.  In addition to catching up on the news and sharing lunch, we will have a chance to go around the room and learn (or remember) 12 techniques.  Each technique is done at a station, on a different 3" X 3" square of paper, so that at the end each person will have a book ring with their technique squares attached.

These are the instructions for the technique square that I will be teaching today: 

1.  Ink Acrylic stamp using Versamark Ink Pad.  The best way to do this is to tap the pad onto the stamp so as not to over- ink the stamp.  Versamark is especially sticky and viscous.

2.  Stamp the image on paper.  Note that it may be completely invisible.  Trust that it is there.  ;)


3.  Sprinkle image with Clear Embossing Powder covering entire area.  (Hard with an invisible image, I know!!  For this sample it is probably best to lightly cover the entire 3” X 3” paper.


  4.  Tap off excess powder.  Ah!  There’s the image!!


5.  Move away from the embossing powder to use the heat tool.  When using a heat tool do not get too close to the paper and always keep it moving a bit.  Keep a close eye on the powder.  As the powder turns shiny, move the heat to a different area of your image.  Make sure that the entire image has turned shiny, and then it’s all embossed.  You can touch it already since it cools off quickly.


6.  What you have now is still pretty hard to see.  It’s time to add ink.  For this project, sponge Smokey Plum in the center, either in a circle or a diagonal line.  Surround the Smokey Plum by sponging lightly with Outdoor Denim.     Finish off the square with Slate ink varying the saturation at different corners to create a more interesting effect.


A few more examples appear on November 2, 2012 post entitled Stamped All Day.

I'm looking forward today to talking to and sharing with women from all over S.E Michigan (and even a few from Indiana and Ohio sometimes).  I hope that you all have a fun and creative time today as well!!

Friday, November 16, 2012

My First Clear Card

I would like to welcome 'the little princess' to my blog family.  I met her through storylane.com where we have been enjoying each other's stories.  She has another blog that I think you will be especially interested in if you are looking for creative inspiration.  Check out a splash of colour to see her beautiful Rangoli (an Indian folk art) designs - you will be impressed!!

I made today's card to mark two special events.  The first was Dawn's birthday.  Dawn is a new friend that I have met through Close to My Heart.  She lives in my subdivision, so I am hoping that we will be seeing a lot more of each other.  She has already helped me out a couple of times when I was in desperate need of red sparkles and specific colors of card stock.  She made it on the birthday list!!  The birthday list guarantees that I will make you a card.  It turns out that it doesn't guarantee that it will be on time!!

Secondly, Dawn's artwork is currently in the spotlight on Jeanette Lynton's (CEO of Close to My Heart) blog.  This is a huge honor and Dawn really deserves it.  Everything that she makes is beautifully done.

To make my combination Birthday - Congratulations card, I wanted to use the Clementine paper because that was what Dawn used for her projects.  I have been shying away from making a clear card because I'm still trying to understand how best to take advantage of it's unique properties.  I give myself a B- on my use of the clear card, but I am happy with it, and I really enjoyed making it.


This design is based on Sketch #184 from The Sweet Spot Sketch Challenge Blog.  It's a fun sketch and it looks like this:


My blog was completely finished and something happened.  I am trying to reconstruct it, but I have no idea what I wrote here!!  I am sure it was extremely clever...  Oh, I think it was that I probably could have photographed this card better to show that it is see-through, but I was mostly concerned with keeping my reflection out of the photo. Darn.  Not so clever after all.


Now for the reveal.  I have to retake this photo because it is supposed to say 'Dawn' on the upper left-hand side.  I am very pleased with the sentiment.  It's perfect for both Birthday and Congratulations:  "May This Be Your Grandest Year Yet!'


I thought balloons were appropriately festive, so I printed them on the reverse of the seasonal circles.


CONGRATULATIONS DAWN & HAPPY belated BIRTHDAY!!
Enjoy.

Thursday, November 15, 2012

Jerry's Wild Card

I love computers when they work and they do what I want them to!!!  Sorry, our computer gremlin is back and I have just about had enough!!  Fortunately, Lisa's gone to bed for the night thus freeing up her laptop.  So I am back in business, so to speak.

This card was an adventure in itself.  It is for Andrew's Uncle Jerry who I greedily claim as my uncle as well because he's a real sweetie!!  Jerry is a lot like my dad in the way that he's always smiling, and always fixing things!!  Today is Jerry's actual birthday, so right there you know that I was stressed a bit starting this project.  I am behind on my schedule and mentally beating myself up.  Why, oh why can't I make birthday cards ahead of time?

The good news is that all of the tags went out in the mail today.  I had Tommy do the Quality Control check on every single tag this morning and he did catch a few things.  I glued a couple of weak spots, glittered a missed bow and printed the back of a tag. How on Earth did that get missed??

Back to the saga.  I wrote Jerry an email this morning to say "Happy Birthday" so that he would still receive my greetings, and to let him know that a card is coming.  In my email I said something about a bear hug.  I thought maybe I could do something with that in my card, so I looked through my stamps and ended up with Wild Thing  C1284 (retired).  I really like the bear, but getting it to hug was going to take some work.  I decided to start with the front of the card and let the inside "simmer on the back burner."  I don't recommend designing cards this way.  This is just usually the way it happens for me.

I was toying with something like "which of these animals would you want to hug you?" when I set up this:


Tom was on the other side of the table and said, "Lions and Tigers and Bears, so the inside is going to say - Oh My!?"  I was stunned.  It really was a lion, tiger and bear. Huh.

At that point I only had the placement of the animals and their framing.  Next, I distressed all of the paper and it changed everything.  Suddenly it looked as though the animals had been nibbling and scratching at the paper and it took on a more organic feel.  The negative spaces looked really dead in comparison.  Burlap!!

I am really pretty allergic to burlap.  Not like I am to cats, but I probably shouldn't be working with the stuff, but art is a cruel master.  I'm just kidding.  Even though I knew that I would probably have an asthma attack, it needed burlap, so I just didn't have a choice.  (I did use my Advair a couple of hours early, and I kept my inhaler on stand-by!!)

After the burlap, the upper and lower right-hand corners still looked too empty.  Tommy vehemently opposed the buttons (which I still contend would have looked good), so I came up with these paws made out of the Durables Round Studs, which are little studs on foam stickers.


Tom stamped the paw prints on the inside of the card, and more on the back.


This was a little technique that I accidentally invented!!  I was testing ink colors for Leonidas (I mentally name all  of my little animal friends.)  I first tried Bamboo because that is the color that is used to distress the paper in the Elementals packet.  Bamboo was much too light to hold it's own against all that was going on in the card, even at that point, so I tried Cocoa.  This was just a test, so I stamped the Cocoa image over the Bamboo and it POPPED!!  I was off just a tiny bit and a 3-D effect happened, as in the photo above.

When I tried to do the same with Bamboo and Chocolate for the bear Gom (pronounced gome, but you have to say it fast - Korean for bear, but it also has the connotation of slow and kinda dumb) the effect worked, but not as well, maybe the lion's mane was the key.  Lastly, the tiger, Slugger.  He is printed in Brown Bag and Bamboo.  I tried this so many times that I made myself sick.  Seriously.  I was dizzy and sort of motion sick (This happens to me a lot!!).  I would either stamp the images too perfectly one on top of the other, or too far apart so that there was a horrible interference that made the cat look extremely nervous!! Tommy ended up printing the one that we used.

HAPPY BIRTHDAY, UNCLE JERRY!!  We hope that you had a wonderful celebration with your family, and we wish that we could have been there too!!!  
Love you!!  Andy, Karen, Lisa, Will and Tom


Monday, November 12, 2012

Modern Traditional Tag

I am finally finished with ALL of my Tag Swaps.  It was a lot of fun and I would do it again!!

This is what the final project looks like:


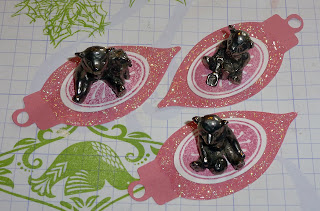
The top of the pink ornament is embossed in silver, cut out and glued over the top of the Cricut shape.  The ornament is attached by Baker's Twine so that it actually swings.  It makes me smile every time!!  The tag is Pear card stock stamped with Garden Green ink.  I used New England Ivy for the TO and FROM.


I had to weigh down the ornaments when they dried, or else they curled from all of that glitter glue.  In order to get enough weight in a small area, I had to recruit some of my teddy bear friends!!


Sunday, November 11, 2012

Guest Blog Party Time Tom's Edition

    Hello everyone, this is Karen's son Tom. We've decided to continue with the guest blog theme for at least another day but don't be surprised if Karen isn't back tomorrow and someone else is writing. My project was painting and building a traditional wooden house music box that my sister Lisa got in Korea. We've had it for a while but only just today opened it and built it. So, without further ado, here it is.

Front View (Yes, that is the Cricut in the background)

Right Side View

Back View

Left Side View

Top View

Inside View (Top off)

    Now, to do this I needed to paint some of the pieces but we don't have a good supply of paint or at least a good variety but Karen had an idea to use her Waterbrush from CTMH to paint with the ink from ink pads (I love CTMH) This technique is displayed in a previous blog post called Thinking of You Card 2.0.

Close up View

Pieces that needed to be colored

Even more pieces

Above, you can see the black mat that forms the roofing of the house. I had to use two wooden pieces that came in the set specifically to trace around with an X-Acto knife to make the correct size and shape of the black mat for the roof that you see in the above pictures. Anyway, my dad Andrew and I then glued together the pieces that needed to be glued and also the black mats to the roof. This didn't take long but afterwards I had a lot of dried glue on my hands and it took a while to get it all off. An hour later I still found some on my arm. I sometimes hate sticky stuff :) Well, this is the end for my guest post, Goodnight.

Guest Blog Party Time!!

Hello Y'all!!
This is Karen's daughter Lisa. Karen didn't have anything to post today, but I had made a card so she suggested I blog for her :)
I know she has mentioned in a different post that my friend is studying in the Bahamas. Her parents visited her recently (I dog sat for them) so they brought me some presents. I made this card as a thank you.


For the card I used footloose paper, which is my favorite paper from CMTH evah!!  I thought the beachy feel was good for the Bahamas. Megan got married last May and I was her maid of honor. Her wedding was all pink and orange with tons of sparkles, so I made sure to use some smoothie ink and lots of glitter glue.
Most of the stamps come from the footloose workshop on the go stamps, but the mosaic swirls and the boarder around the turtle are from an older stamp set, my mom recently bought called Bon Voyage D1316.
I don't know how well you can see it in the photo, but I was careful to put the glitter glue only on the green parts of the turtle shell and not the white lines, it was fun and looked great when I was done. 
If you look at the edges of the paper rectangles, you can see that I used scissors to distress the edges and then sponge distressed them with creme brulee ink. I like how it turned out with raggedy edges alongside the glitzy glitter.
On the inside I put Thanks from A Little Thanks D1444. I love this set because I made about a hundred thank you cards for Megan for her wedding. I use this set for every thank you card I make.
 
This is what I put on the back of the card. I always put something on the back of my cards as a reward for anyone who checks. I'm sure Megan and her mom will notice, the clam is in pink and the circle is green. Megan and I are complete opposites and compliments so we joke about our favorite colors being compliments as well :)


Here's the envelope that matches my card. The pic is of the front of the envelope with the back flap up.


Well, that's all from me. I hope you like my art as well as my mom's. She should be back tomorrow with something new. Thanks for visiting with my mom and me today.
~Lisa

Friday, November 9, 2012

Modern Traditional Tag - In Progress

Yes, I realize that it's a strange title, but that's the name of the swap category.  Modern refers to the color palette, in this case Pear and Cotton Candy.

This is one of my the ornaments for the tag that I am designing:


It required the masking technique with a little twist, so I thought I would share it today. First I stamped the entire ornament on thin scrap paper and cut out the bird.  I put some repositional adhesive on the backside of the bird, then set the good-side against the stamp exactly in place.


It stuck there well enough while I lined it up on my ornament shape.  I pressed the un-inked stamp down and the bird mask stuck with the repositional adhesive.  Now it is perfectly in place to mask the bird.  Below you can see the mask alone on an ornament, as well as the finished stamp once the mask has been removed.

Also note on the carrier sheet, around the stamp image there is a little line and the numbers 2.5".  This lets me know to set my Cricut at 2.5" when I am cutting this shape on the CTMH Art Philosophy cartridge, so that it is the perfect size for this stamp.


Lastly, I cut a rectangle that was 1" X 1 1/4" to fit just the bird.I inked the center of this ornament in Cotton Candy and just printed the bird.  I attached it with foam tape for a little dimension.

I hope to be able to show you the finished tags tomorrow because time is running out!! Tick, tick, tick..


Thursday, November 8, 2012

Vintage Christmas Tag

So, I've been kind of worrying about this next tag.  I signed up for a tag swap in four different categories.  This one is vintage.  Vintage is really IN right now.  I know how to distress the edges of paper, but I haven't ever really "done vintage."  I looked through my Christmas stamps several times and I guess that I haven't bought much of what I would call vintage, so then it came down to this: go shopping?  borrow stamps? or make something work?  My first inclination was to borrow because I knew of the perfect set of stamps* that I was sure that I could make work, but I really hate to bother people, so chickened out.  I could buy something, but I have been really trying to keep this blog Close to my Heart!!  Plus, I rarely buy anyone else's stamps anymore.  So, make what I have work!!  I knew it was going to come down to this!!  Why do I fight it?

In yesterday's post, I talked about how it takes a few tries to get things right.  Here is another example:


My idea was that when you lift up the plain cover tag, you would see the decoration, but then where do write the "To:" and the "From:"?  If you write that on the cover, there is really no need to look inside:


So, I tried switching that around.  The background music stamp has to be stamped twice to fill the tag, but because you can see through the block it is pretty easy to line it up right.  On the upper right you can see a tag that has already been distressed.


For this swap, there is a requirement of, at least two embellishments.  I knew sparkles were out of the question.  I asked Will and he said buttons, ribbon and metal.  Smart guy!!


That was Lisa looking through old buttons - real vintage!!


I tinted the ribbon with matching ink.  I'm very happy with the color.  I sewed the button on with embroidery floss that Lisa dug out of her room.


Yes, I sewed around the edge.  Lisa had a matching green embroidery floss that I had to put to use.


I finished off the back of the tags with a second generation print of the music notes. While I was sewing, I was shocked that my allergies weren't giving me any problems. I am allergic to old books and papers.  This tag looked so old, that I forgot that it was new paper.  Yep, I fooled myself!!

*This is the stamp set that I would have borrowed.  Christmas Delights D1518.  Vintage, right?